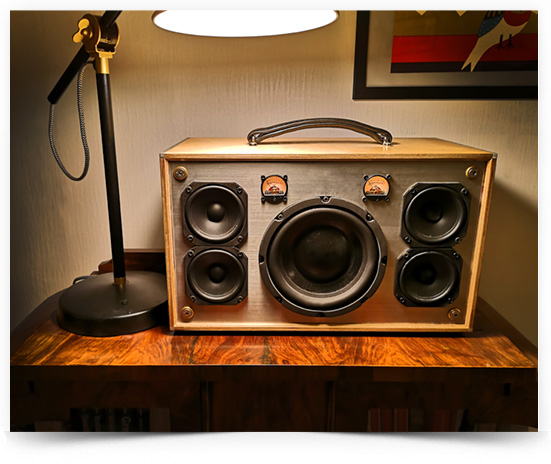
Well thats at least what I ended up calling it. It was an abbreviation of 'The Box'. For the best part of a year if anyone asked me what I was doing with my evening I would reply 'I'm working on the box'. This project really adventured into many new areas for me and I learned a lot. And after all of that work, it is a million miles from perfection, but I'm damn proud, and its started me on a speaker building adventure.
I wanted power, fidelity and all of it in a potable package. It needed to be battery powered and easily rechargeable. It was going to have 3 channels, left right and a dedicated subwoofer. Audio needs to be able to be fed in via a bluetooth link or an auxiliary 3.5mm jack cable.
I decided to go down the rout of using full range drivers for the left and right speakers with a central subwoofer. I spent a very long time looking at driver specification sheets to choose the correct ones, which ended up being 2 TC9FD's by Peerless per side and a Dayton Audio DCS 6" subwoofer.
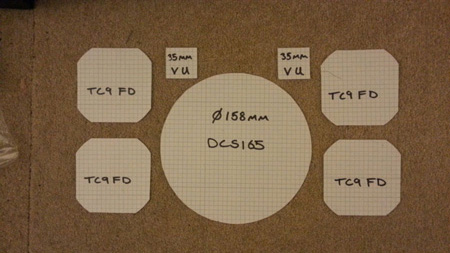
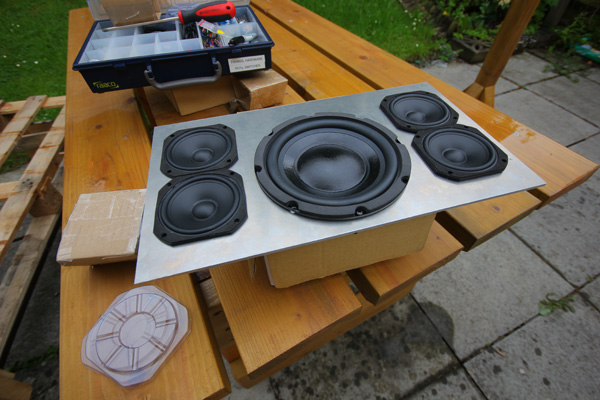
Now, rather than try and deign a fancy enclosure and work the drivers into it I just tried arranging the drivers as paper outputs to get an idea of the front baffle. As you can see I had already decided at this stage that analogue VU meters were a necessity!
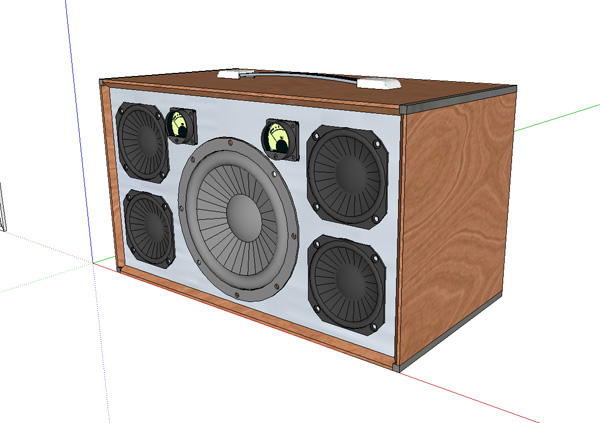
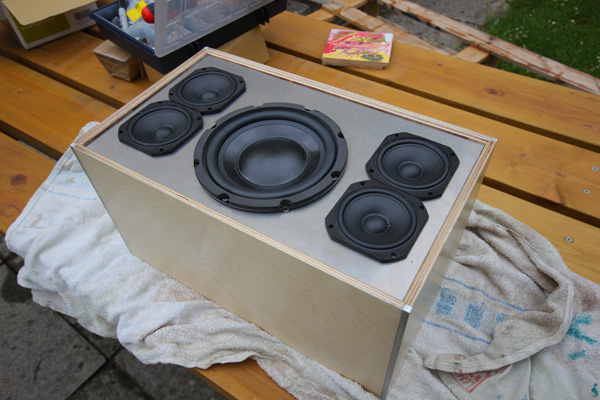
Once the front panel layout was decided a 3d model was made which gave me a sense of volume and construction. The wood outer frame was going to be made of Baltic birch plywood and the front/rear panels were aluminum. The design would allow for easy servicing by simply removing either aluminum panel to access the internals.
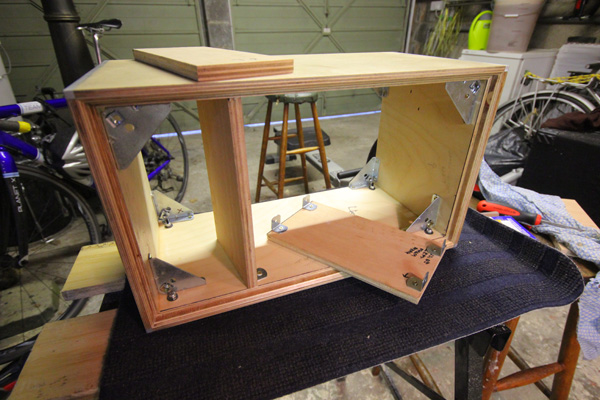
I was a bit lax on my photography when I started this project and I missed all of the woodwork. I ordered Baltic panels already cut to size then jointed the edges with a 45 degree router bit. I deliberately left a square of joint open in the corner so I could inset an aluminum bar to make the box a little more rugged and match the aesthetic of the front panels.

The woodwork was finished in low-sheen nitrocellulose lacquer (similar to what is used on guitars). Its a durable finish that enhances the look of the wood.
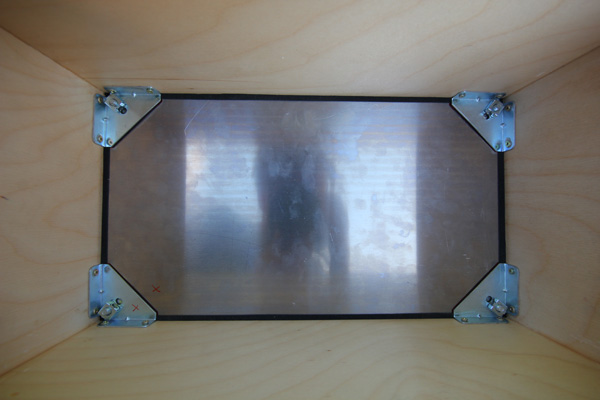
Mounting the front panels was a bit of a challenge. They sat in a recess that was cut into the panel work with a router, then they were pulled back into place by bolting them into a cage nut in a corner bracket. In the end this worked really well, especially with the foam tape sealing the joint. The panels themselves were 4mm aluminium that was ordered pre-cut to size from an online vendor.
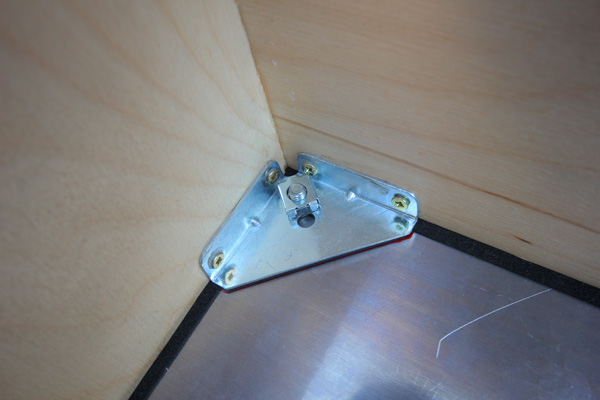
Detail of the cage nut in the corner bracket. The solution was nice because it reinforced the frame and secured the panels.
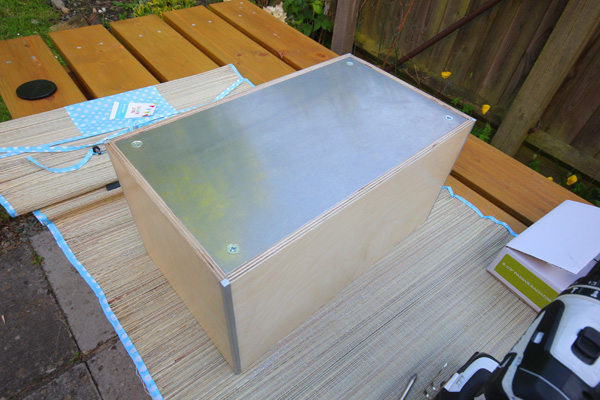
The rear panel secured. All it needs now is its cutouts.
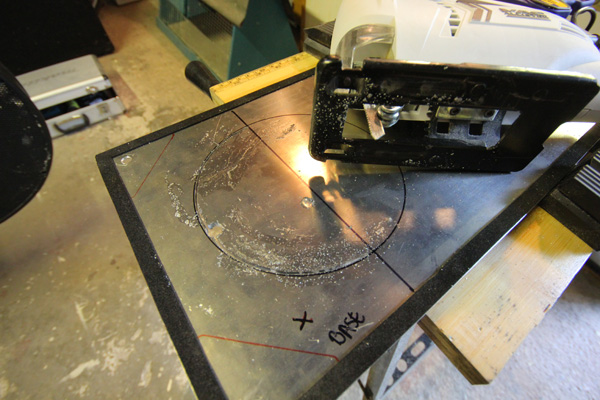
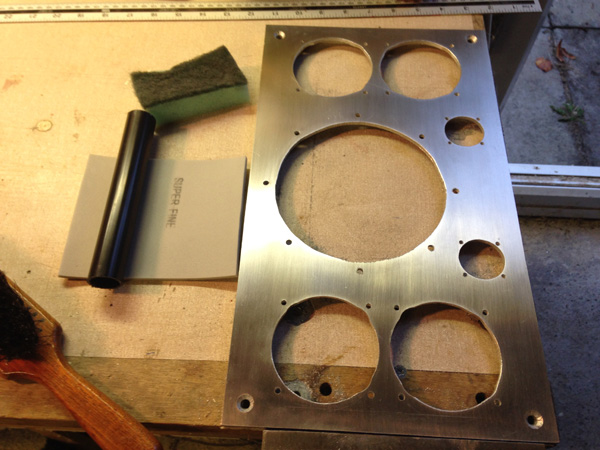
The panels were hand cut with hole saws or a jigsaw (for the larger holes),then cleaned up with lots of filing.
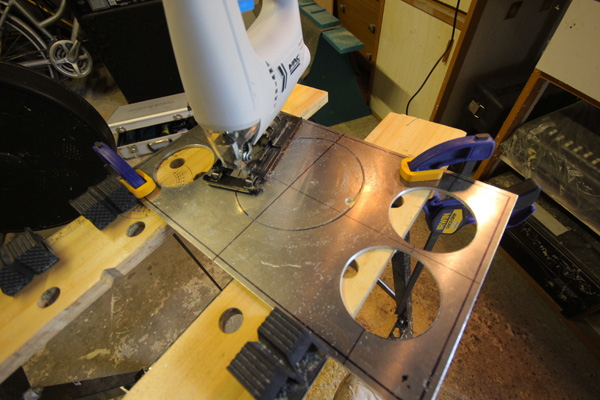
Most cut edges were to be obscured by the flange of a speaker and hence absolute accuracy was not critical.
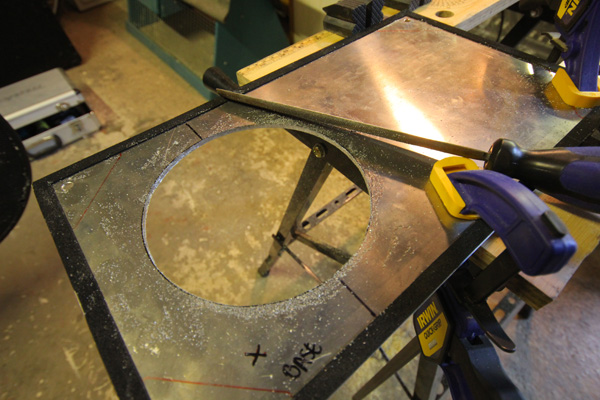
Filing off the burrs.
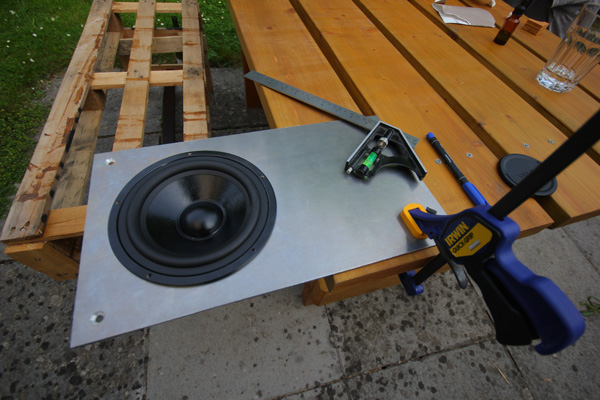
A test fit of the passive radiator to mark out the screw holes required.
Test fitting the front panel.
And in the enclosure. I was pretty pleased with the fit so far.
The panels were removed and stripped down so that I could apply a brushed finish to them. This involved using scotch brite pads, using a jig to ensure the brushing was all in the same direction.
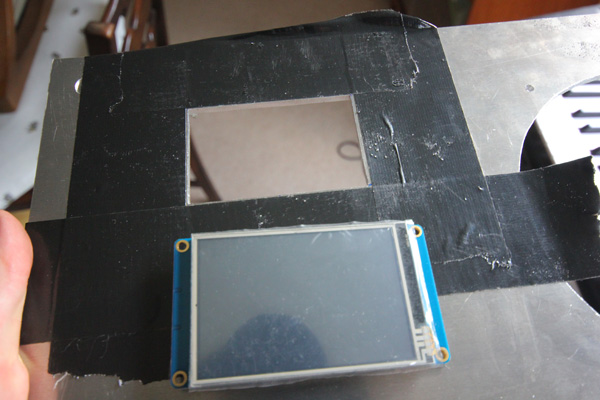
The cutout for the LCD was drilled with multiple small holes then hand finished to a square with files.
This particular part of the project took a very long time, most of which was spent on the computer looking at technologies that would fit my needs. I didn't take many build photos of the electronics for that reason, and what you see here is mainly a breakdown of the final prototype.
The amp was a module by Sure Electronics, which was fed from a DSP board. The DSP is a FreeDSP design that I constructed myself based around the ADAU1701. The visual programming environment SigmaStudio was simply brilliant, enabling me to start implementing DSP into my projects with relative ease (and not much programming). All of the functions the DSP offered needed controlling, so thats when I discovered Nextion HMI LCD touchscreens. These are programmable with a visual interface and link well with Arduino boards. This meant I could have an Arduino talking to the DSP over I2C, which was taking commands from the user on the touchscreen.
It sounds simple enough, but implementing it all was a nightmare. Especially when you add in switchable VU meters, bluetooth and AUX switching via relays, amplifier mute control (to avoid pops) and everything else.
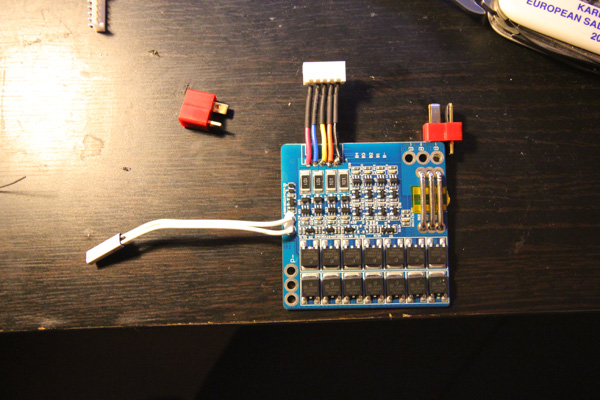
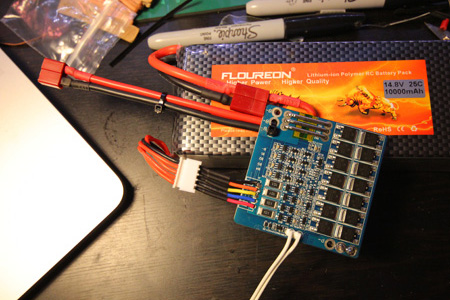

The chosen battery was a 4 cell lipo at 10 amp hours - huge. Finding a battery management board that does not allow a discharge below 3v (the safe lower limit per cell on lithium polymer) is surprisingly difficult. This project actually drove me to design my own battery management systems for future systems as it was such a pain trying to find something that was safe, easy enough to implement and cheap. I did eventually find the board pictured which worked very well in the end, after modifying it for my pack. It was heat shrink wrapped and affixed to the pack to make it a self contained module.
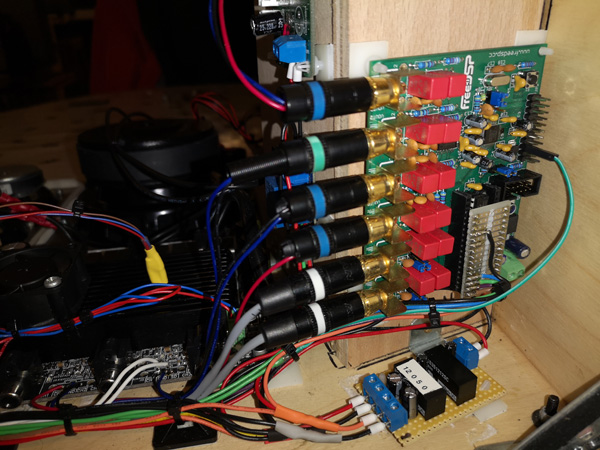
Here is the FreeDSP in its home. The stripboard plug-in is the interface to the Arduino, via I2C. The outputs were left as Phono plugs to aid prototyping (but there could be removed to save weight). Finally in the bottom right you can see two isolated DC to DC converters, providing the power for the DSP and the bluetooth. There were necessary to eliminate ground loops.
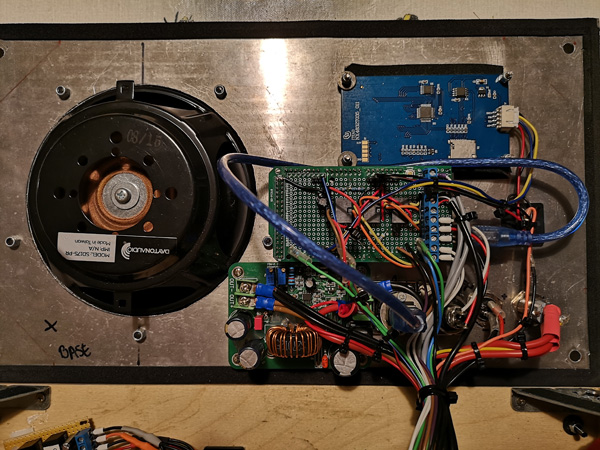
The rear panel internals. At the bottom you can see the boost converter, bolted to the rear panel as a heatsink. This takes the battery voltage (nominal 16.8V) and boosts it up to around 35V to get some serious power out of the amplifier. It can handle at least 300W in itself and proved to be quite efficient. Next up is the Arduino in the middle, with a custom expansion board that handles audio switching with 2 small signal relays. The third relay controlled amp mute. Top right is the Nextion HMI touchscreen. Bottom right is power in, power switch, aux in and USB.
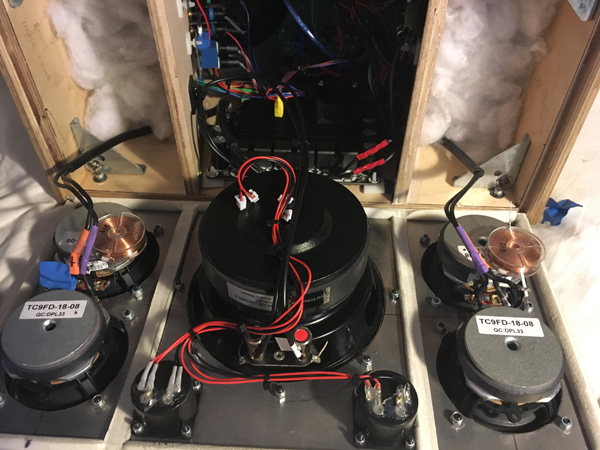
The fully fitted front panel. You can see the pairs of full range drivers are isolated and the lower one of each pair has a series inductor. This prevents high frequency comb filtering from two point sources playing back the same signal. They were added because the comb filtering was quite bad when changing your position vertically relative to the speaker, for example going from sitting to standing.
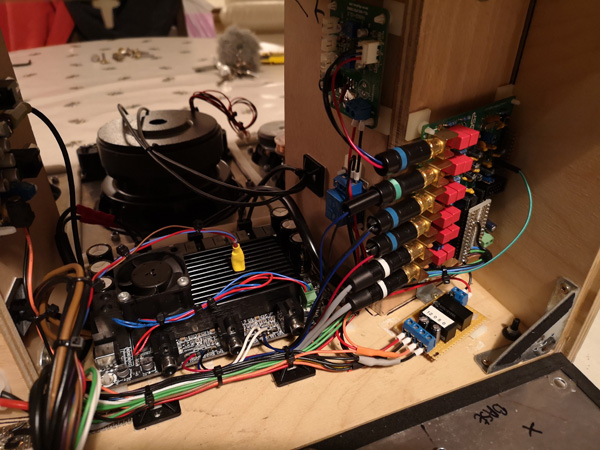
Here you can see the 3 channel amp with the added cooling fan and temp sensor. The fan triggers at 50 degrees centigrade. The temperature sensor feeds back info to the Arduino which then displays it on the diagnostics area of the LCD.
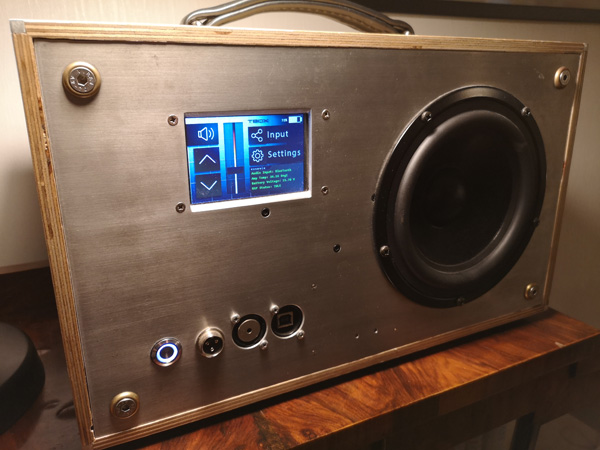
The finished rear panel. It looks a bit bare to me, but not bad for a prototype! The USB was intended to be a power outlet, but I left it as a B type so that I could easily link to the DSP/Arduino for programming changes.
Examples of the graphics I designed for the LCD. I was really happy with the interface in the end, but it took quite a few designs to get something clean that worked well.
Click on the above picture to enlarge.
Programming up the DSP. I often did this with the speaker on my bed so the duvet would adsorb any (extremely loud) audible malfunctions!

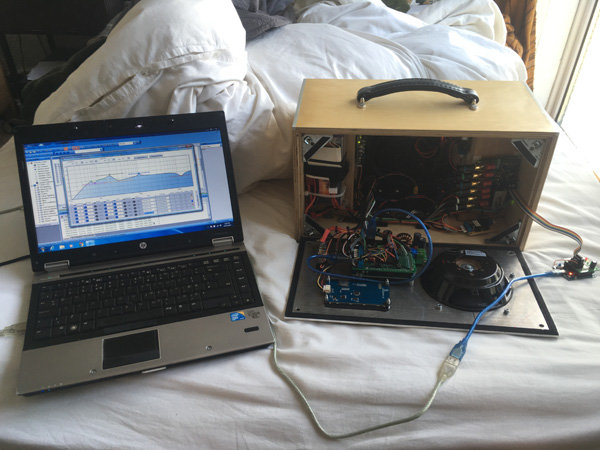
The closest thing I have to an Anechoic chamber... a lounge. Here I was putting test sweeps through to get a corrective EQ profile.
As I mentioned at the beginning the T-Box 600 is very far from perfection, but its still pretty damn good. The battery will easily do 12 hours of continuous loud music and it sounds great. The DSP took a lot of tweaking to flatten out the highly imperfect enclosure but once I had a flat profile it was easy enough to make the thing powerful, bass heavy and exciting.
It is, however, highly impractical. It weighs a tonne thanks to the ferrite magnets on the speakers and the heavy wood & aluminium enclosure. I honestly think I would be physically unable to carry this to the local park if I wanted to. When it has made it out camping it has been in the boot of my car and has been a brilliant addition to a warm summers night around a campfire.
The plan is that next model will use electronics completely designed by myself and speakers with neodymium magnets. Its going to be another step up in terms of difficulty, but worthwhile. A lot of the modules I used in this speaker could be combined into a far more homogeneous system. Let's see where I am with that in a year!
Thanks for reading.
Edd
Back to projects